Friday, January 31, 2020

Spicy Chicken Pizza 11/325

Before the first rise

The Relation


This receipt was submitted by Genie Sullivan and John Gassmann (Gertrude>Henry). They are, respectively, my aunt and uncle. Both of them are huge foodies, and I consider Genie to be a culinary expert on most things. This was the first time I actually called the author of a receipt for a consultation before I embarked on the journey (you can find her expert alterations and suggestions below in the process).

The Process


After the first rise (SO BIG!)
My name is Maddy and before this blog, I had never successfully made a pizza. My dough always ended up too thick or too thin, or there was excess moisture dripping everywhere. Maybe I just hold myself to a higher standard, but pizza is not my strength. Hence why I called Genie before I made this one. She advised me that you can never let the pizza dough rise too long and she often made the dough the night before and let it rise overnight in the fridge. And so, at 11:00 AM, I started making pizza that I would not be eating until 7:00 PM at night.

I substituted the rapid rise yeast with regular yeast (per the author's instructions). Genie also advises that you should add some sort of sugar for the yeast to "munch on," which is where the tablespoon of honey comes in. Once I had my dough prepped, I let rise on the counter for 2 hours. Holy moly, this dough had some height! I was shocked at how huge it had become. Feeling really confident, I punched the dough down with my bare fist. Note: don't do this. The dough will stick to your fist and when you lift your hand up, the whole bowl will come with it. I recommend dusting your fist with a bit of flour before punching. Post-punching, the dough continued to rise in the fridge after that. 
Such chickie precision

Then the dough and I went on a little car ride to take care of some errands on the way to its final destination of consumption. So, I guess I let the dough rise at car-temperature for another hour and a half. And then probably a bit more while we prepped the other ingredients. My sous chef for the evening, Climbing Pal Grant, was in charge of the delicate quarter-inch slicing of chicken, in addition, the shredding and division of cheese (Genie suggested adding pepper jack cheese to this recipe in addition to the fontina and mozz). Note: you can never have enough cheese. 

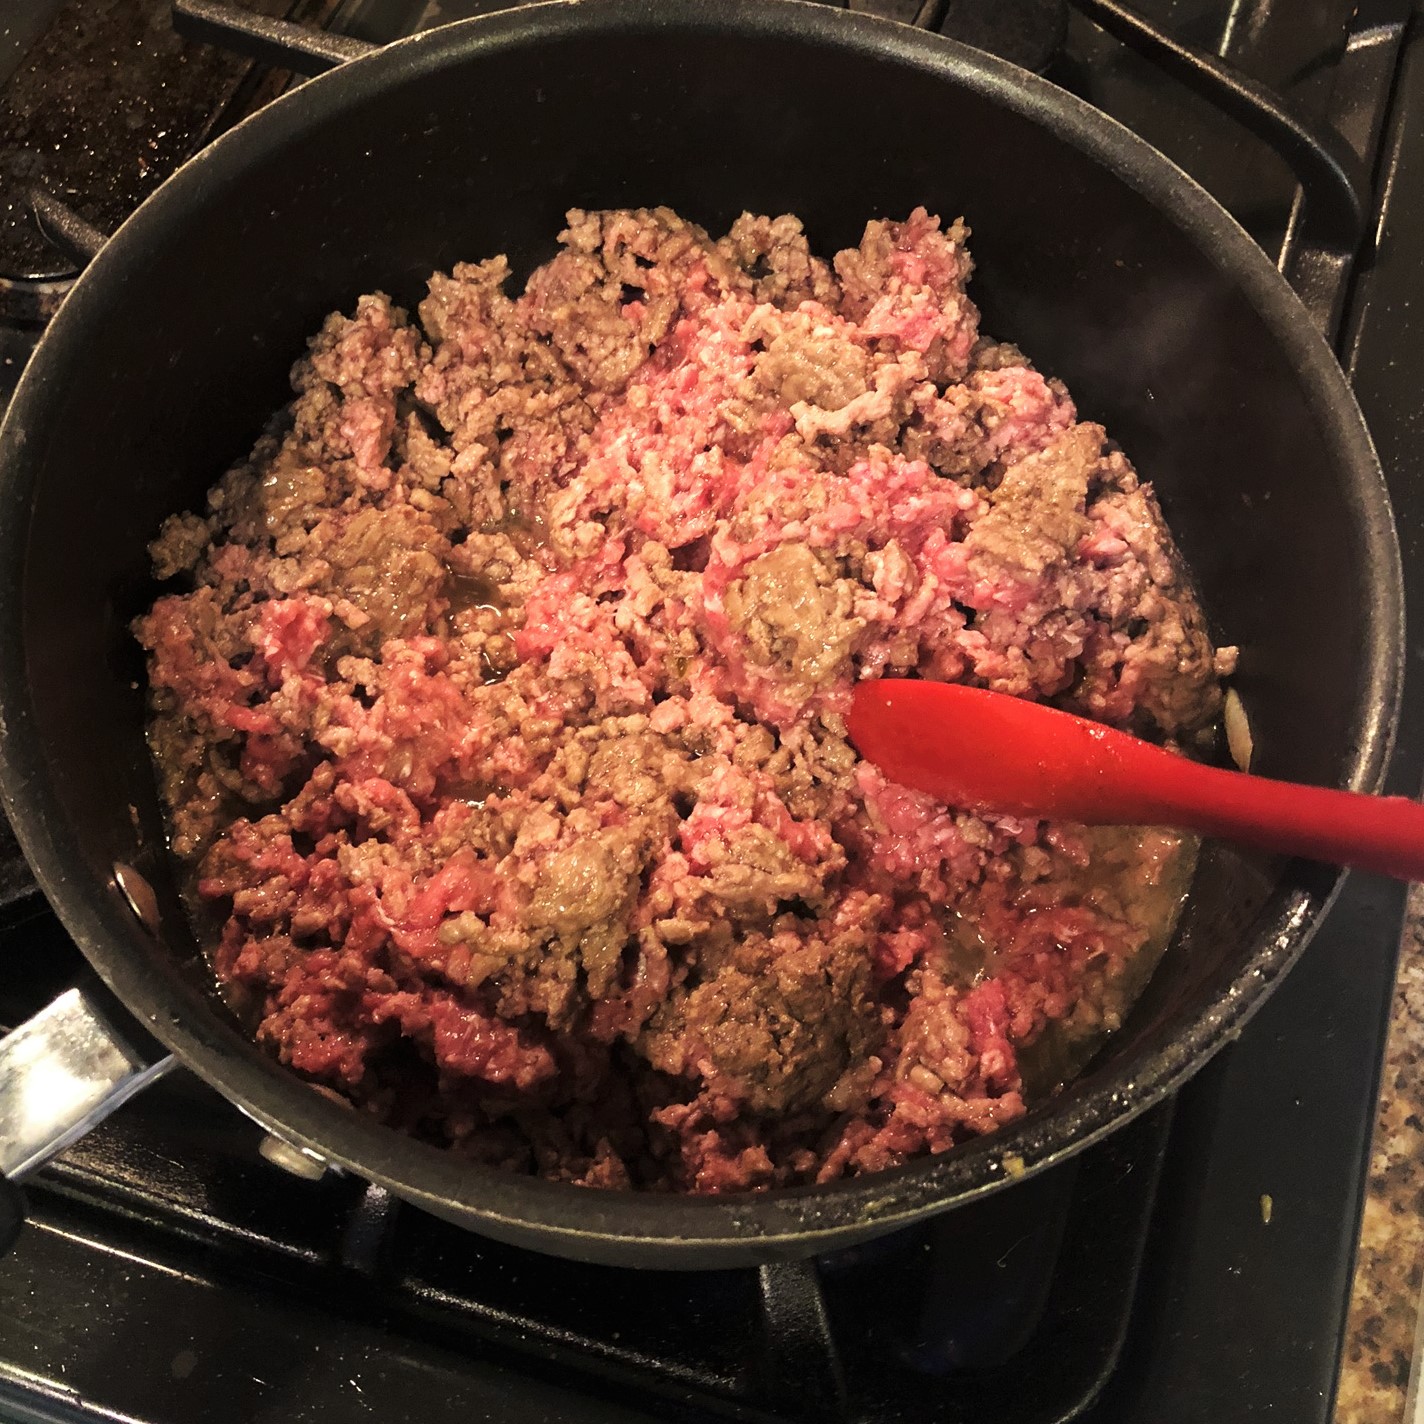
After all slicing and shredding had been completed, we entirely overcrowded a cast-iron skillet according to the order in the receipt. As I am writing this, I am realizing I absolutely put the wrong ends of the scallops on the pizza (the instructions clearly say to use the white bulbs but I am illiterate and used the green ends). On top of that mistake, we also made a slight alteration in terms of the oil everything was sauteed in. Something about burn temperatures was discussed and we ended up using avocado oil.

Questionable shapes
Making the actual pizzas was more difficult than I thought it would be. Actually, scratch that, it was exactly as difficult as I thought it would be. First, I used a rolling pin dusted with flour, but that didn't seem to be all that effective. Next, I tried stretching it out with my hands, which seemed to be more effective. The pizzas were not traditionally shaped by any means. We laid the pizza on aluminum foil, spread oil (unsure if it was avocado or olive) using a spoon (there was a minor paper towel shortage), and dusted with cornmeal. 10 minutes was perfectly sufficient for bake time and super advantageous since I had been staring at this dough for 9+ hours and would not have been willing to wait a moment more. 

The Feedback


One could definitely argue that a sample size of two does not make a reliable review, but this is what you get. This pizza was fire - delicious crust, excellent flavor, aesthetically pleasing, the whole nine yards. The pepper jack was a truly inspired suggestion. I will say that it was not as spicy as I thought it would be. This is not a criticism whatsoever, as I am not very tolerant of heat, so I was able to really enjoy it (versus just powering through the pain per usual). It was certainly the best homemade pizza I have ever had.

Pizza with a side of aluminum

The Receipt


SPICY CHICKEN PIZZA - CC90
John and Eugenie Gassmann

DOUGH
     1 Tbs honey
     ¼ cup warm water
     1 package rapid rise yeast
     3 cups flour
     1 tsp salt
     ¾ cup cold water
In small bowl mix warm water, honey and yeast. Let rest 3 minutes. Transfer activated yeast mixture to large bowl. Add flour, salt and cold water. Knead dough until it does not stick to your hand. Place dough in well oiled bowl and cover. Let rise 30–45 minutes. Punch down. Let rise again, punch down and roll into 4 small pizzas.

TOPPING
     2 boneless breasts of chicken sliced lengthwise into ¼ inch strips.
          Cut resulting strip in half.
     ½ cup cilantro – fresh – leaves only – no stems
     1 medium jalapeno, minced and deseeded
     4 oz sliced fresh shitake mushrooms
     2 medium scallions – bottom third of scallion only – white bulb – 
          sliced lengthwise
     1 fresh red pepper, thinly sliced
     1 fresh yellow pepper, thinly sliced
Sauté in ¼ cup olive oil in the following order: mushrooms, peppers, scallions and jalapeno, cilantro, chicken. No more that 5 minutes – chicken will further cook during pizza baking. Drain the sautéed mixture and set aside. Grate 4 oz Fontina and 4 oz Mozzarella. Place 4 mini pizzas on 2 cookie sheets, which have been oiled and dusted with corn meal.

Pizza construction: dough, cheese, veggie and chicken mixture, cheese. Bake at 500° degrees for 10 minutes.

Friday, January 24, 2020

Cousin Mary Beth's Chicken & Couscous 10/325

The Relation


Teep (left) and Sally
Jim Eagleson submitted this recipe, but I assume it's called Mary Beth's chicken for a reason. After some investigation (shoutout to Kathleen Degnan for the tip-off), we are highly confident that Mary Beth is the wife of Dan Hutcheson (George>Anne Therese). Anne Therese's (better known as Teep) descendants wear a lovely maroon color (not to hate on Gerty Gold, but it does nothing for my pale complexion). Mary Beth Hutcheson would be my first cousin, twice removed (by marriage) and Teep would be my great-great-aunt.

The Process


We are on recipe three of three that I made for my Old Co-Workers! The end is in sight!

Okay. Let me preface this rant by saying that I understand the value of using fresh ingredients. The taste is brighter and the color is better and, and, and. However, I have never been so frustrated at an activity as I was when I was picking the thyme leaves off the stems in this receipt. I probably sat there for 30 to 45 minutes ripping the little tiny leaves off until I had enough for the receipt (again, this one I doubled). Roommate Jess looked over at what I was doing and just said: "It looks like you're going to be here a while." 

It's a lil crowded in there...
Aside from my new found hatred of fresh thyme, I also zested my first lemon. I used a cheese grater and a whole lemon to get what looked like a teaspoon of lemon zest (I estimated). Zesting lemons is much harder than it looks, but perhaps it's easier if you have a zester... or proper equipment of any kind.

I marinated the chicken overnight so I didn't have to prep it the day of. I used whole chicken breasts that I cut in half and marinated them in a gallon freezer bag. Unfortunately, I do not have a grill and didn't plan far enough in advance to use someone else's. So, I overcrowded a non-stick pan and sauteed the chicken for a good 15 to 20 minutes over medium heat (covered). I will admit that the flavor would probably be much better if you grilled it.

Sans drizzle
The receipt doesn't tell you how much couscous to cook, so I made 2 cups of dry couscous. I used some extra diced onions from the Savory Scalloped Potatoes recipe and some broccoli I had lying around for the optional veggies. I sauteed the onion a bit and steamed the broccoli for a few minutes before I tossed them into the steamed couscous.

I served the chicken and couscous separately, so I didn't actually drizzle any of the leftover marinade onto the chicken. It all went to the couscous. Oops...

The Feedback


Due to the lack of marinade drizzling, I thought the chicken was rather bland. But the couscous... the couscous. Amazing, top-notch, would die to eat it again. Despite how angry I got at the thyme, this was a great recipe. Dinner guests were also a big fan of the couscous. My sincerest apologies to Mary Beth for not doing the chicken justice.

*drools*

The Recipe


COUSIN MARY BETH’S CHICKEN AND COUSCOUS CC04
Jim Eagleson

CHICKEN MARINADE – for 4 boneless, skinless breast halves
     2 minced garlic cloves
     ½ tsp lemon zest
     2 Tbs white wine vinegar
     4 tsp fresh thyme leaves
     2 Tbs fresh oregano leaves
     2 Tbs minced Italian parsley
     2 Tbs salad oil
     6 Tbs olive oil
     ½ tsp salt
     ½ tsp freshly ground pepper
Combine the garlic, lemon zest, vinegar and herbs. Whisk in oils in slow steady stream. Save half for couscous dressing. Use the remaining half to marinate chicken.

COUSCOUS
     Prepare couscous per package directions.
     Add any slightly cooked veggies such as onion, zuchinni, broccoli, tomatoes, carrots, etc.
     Make ahead and refrigerate or prepare and set out at room temperature.
     
Grill chicken, slice thin and add to couscous. Drizzle extra marinade – or a dressing of your own choice – over all and toss.

Wednesday, January 22, 2020

Savory Scalloped Potatoes 9/325

Liz Weber - an icon

The Relation


Liz Weber is the wife of one of the original descendants of Mama and Papa Weber (George and Elizabeth). She is the wife of Joseph Weber, one of the three brothers. They are represented by the powder blue colored shirts in Cousin Club. Liz Weber is my great-great-aunt.

The Process


This receipt is the second of three receipts I cooked for my Old Coworkers in one night. I specifically picked this recipe because Roommate Lora's mom pawned off several grocery bags of potatoes on her last week. So I said, "guess we're having potatoes". Again, I doubled this recipe.

Lunch is served
Maybe this is totally normal and I am entirely overthinking it, but I was very confused by the idea of pre-cooking my potatoes. Like, the receipt calls for "sliced cooked potatoes." My mind was spinning. Do you bake the potatoes and then slice them? Do you slice the potatoes and then roast them? Do you boil them like mashed potatoes??? I ended up googling "how to cook potatoes" and then going from there. 

I decided to peel my potatoes, slice them, and then boil them for five minutes. After draining the water, I let the slices cool off while I worked on the "sauce" and other dishes. Not until this exact moment did I actually bother to look up if celery leaves were different than regular celery stalks (they are). So, I used celery stalks instead of leaves... My apologies to Liz.

Once all blended, you've got a ghoulish looking liquid not unlike what a lunch lady might serve a young student in a cartoon. To say the least, it did not look appetizing. But the smell? Amazing

Again, not the prettiest
I greased the bottom of a 9x13 casserole dish with my standard olive oil Pam (I highly recommend, live by that stuff). At first, I was layering the potato slices with the precision of a world champion Tetris player, but after the first layer, I just dumped all the slices into the dish and let them settle however they so chose. The ghoulish liquid gets poured on top and then a layer of cheese (I had leftover Mozzarella). I did not add paprika (mostly because I forgot).

I popped my masterpiece into the oven and checked on her every five minutes. I definitely lost track of time, but I am pretty sure she was baking around 20 minutes. I waited until I saw some clear browning, not just bubbling.

The Feedback


This was a hit. Delicious beyond compare. Several of my dinner party attendees shouted this out as a favorite. There were nine of us total and there were only scrapings left by the end of the night. Perfectly savory and just divine. Liz, you nailed it.

Look at that beauty!!

The Recipe


SAVORY SCALLOPED POTATOES   CC90
Liz Weber

4 cup sliced cooked potatoes
¼ cup diced onion
¼ cup celery leaves
2 sprigs parsley
3 Tbs flour
¼ cup butter
1½ tsp salt
¼ tsp pepper
1½ cup milk
¼ cup grated cheese

Place potatoes in greased baking dish. Place onion, celery, parsley, flour, butter, seasonings and milk in blender. Mix 1 minute. Pour over potatoes. Sprinkle with grated cheese and paprika. Bake in 350° oven until bubbly and brown.


Monday, January 20, 2020

Sauteed Red Peppers and Spinach 8/325

The Relation


Jim Eagleson is Dot's second youngest child and her youngest son (the logic puzzler inside all of you should have inferred that Dot's youngest child is a daughter). Jim gets an extra special shout out as he was the one who procured the digital copy of the receipts book for me. Can you imagine if I had to re-type all of these recipes on here? Absolutely not an option. More importantly, he also was one of the main organizers of some of the more recent Cousin Club events. Overall, great guy and completely by accident, this blog was originally published on his birthday (HAPPY BIRTHDAY JIM!!!). Jim is my first cousin, twice removed. 

The Process


Guest Sous-Chef Maria

This will be the first of three blogs on a night where I made three receipts for a dinner party I had with some of my Old Co-Workers. On this particular dish, I want to highlight my dear sous-chef, Maria. More on her level of assistance later (look at how cute she is though!!!).

I did double this recipe, so if anything sounds a bit off, let's just chalk it up to bad math and call it a night. I personally have never sauteed two different fats together, so the whole olive oil and butter combo threw me for a bit of spin. I used extra virgin olive oil as it was all I had on hand. I think there is a rule against using extra virgin olive oil for high-temperature cooking because of its low burn temperature, but I was living on the edge.

Had to use a big pot instead of pan
I am getting dangerously good at chopping bell peppers. I'm no expert (yet) but I think I am well on my way, especially after slicing my way through four of these on a bit of a time crunch. It's all about the seeding of the pepper and membrane in the most efficient way possible. Also, I dislike immensely that the process of removing seeds from a pepper is called "seeding". I think it should be called "de-seeding". But that is neither here nor there.

Four handfuls, or in this case, eight, of spinach, is all fun and games until you have to snip the stems. Which, to Jim's credit, I totally understand. I very much prefer my spinach with no tail. It ruins the whole consistency. This is where Maria comes into play. This lovely goddess of a woman snipped the stems of a whole 10oz bag of spinach like it was her job for 20 minutes (she was compensated in dinner, don't call the labor union please). Upon adding the spinach to the sautee-ing peppers, I asked her "hey, how many large handfuls do you think that was?" hoping she would say eight. She paused and thought for a moment and then say, "maybe four?". And so we got the other bag of spinach out, said to hell with snipping, and tossed it in the pot. In our defense, we were hungry and rushed.
Stem snipping never looked so good
I confess that the dish was on the table about to be served when I realized I had forgotten the heavy splash of red wine vinegar. I dashed back to the kitchen shouting "Don't touch the peppers!!!" snatched my red wine vinegar, and heftily splashed some into the dish. I took a group consensus on if I had added a "hefty splash" (as opposed to a paltry splash, I suppose) and the room gave me the affirmative. So we ate.

The Feedback


Personally, I am a huge fan of bell peppers and spinach, so this was right up my alley. My dinner guests gave it good reviews as well, specifically stating it paired really well with Mary Beth's Chicken and Couscous and Savory Scalloped Potatoes. Old Co-Worker Beth was a particular fan (granted, she had some dietary restrictions, so this was one of the only things she could eat on the table). I also had it as leftovers with some salmon a few days later, and let me tell you... phenomenal *chef's kiss*.

The Recipe

Pre-Red Wine Vinegar Splash
SAUTEED RED PEPPER AND SPINACH CC90
Jim Eagleson

Time: 10–12 minutes
Required: Stove at medium high flame and sauté pan – do not use an iron skillet

Tbs pure virgin olive oil
Tbs butter
Pinch of salt
2 sliced red peppers
4 large handfuls of well cleaned – hate that sand – fresh spinach, snip stems
Hefty splash of red wine vinegar

Heat olive oil and butter in sauté pan. Fry pinch of salt. Sauté red pepper. Add handfuls of spinach, stirring and turning constantly with wooden spoon. Sauté until heated through – 3–4 minutes. Be careful not to overcook. If the spinach starts to turn an olive color, you’ve overdone it. Remove from heat. Stir in a hefty splash of red wine vinegar. Serve immediately.

The New York Italian lady whose receipt this is fried fresh garlic before adding the red pepper – it’s better without. Get the garlic on the bread or in the sauce. For a change, try yellow peppers. Don’t use green – will clash with the spinach.

Saturday, January 18, 2020

Rice Crispy Cookies 7/325

Will the Crispy Rice be ok??

The Relation

This is our first recipe that was submitted by an anonymous contributor, so I haven't the slightest idea of how I am related to them or any fun facts or stories. In lieu of that, I want to thank all of the very supportive members of the Cousin Club who have been reaching out or commenting on my post. I have officially shared the blog with all 453 of you. Keep the support (and feedback) coming!

The Process

I will be honest: I specifically chose this recipe because I got a new toy and I wanted to try it out. After two recipes that required you to drop the dough by teaspoon onto a baking sheet, I'd had enough of trying to estimate a teaspoon-sized dollop. Or using a teaspoon measuring device and having to scoop out the batter from the device. I was at my breaking point. So, I bought a little teaspoon-sized scoop that plops the dough out for you. Technically, it is a half-tablespoon size, but beggars cannot be choosers. 

Fork technique on point
Back to the recipe. These cookies were pretty straight-forward, but again, I was dealing with a type of cookie that I didn't really know what it was supposed to look like as a finished product. Per usual, I assumed the butter/margarine called for should be softened. 

As I was mixing all of the ingredients together, I was oddly anxious about the rice crispies (technically I bought crispy rice, but it's all the same) getting crushed into the dough? It was not a problem whatsoever though.

With my new toy, I was a speed demon getting these bad boys onto cookies sheets. They are very small and don't spread too-too much, so you can get away with about an inch between each cookie. This is crucial because this recipe makes a ton of cookies. I had 5 trays full of cookies and still have half of the batter left. 

In terms of bake time, the recipe suggests 12-15 minutes (a rather large window). At 12 minutes, I checked on them and they looked done - potentially overdone. I sprang into action to get them onto a cooling rack ASAP to prevent further damage. Once they had cooled, they were not bad at all! The next few batches I kept in the oven for 10 minutes just to pay it safe. They all came out delicious.

Left cookies 12 min, right 10 min

The Feedback

Not going to lie here, I think these have been one of the biggest hits. Maybe it's because of their size, but I had multiple people coming up to me at the climbing gym telling me they had between 5-10 cookies. They are definitely a crunchy cookie, not chewy at all. Not my typical preference for a cookie, but they were really delightful. Not too sweet and very light!

The Recipe

RICE KRISPY COOKIES          CC80
Anonymous

1 cup brown sugar
1 cup white sugar
1 cup margarine
1 cup oil
1 egg
2 tsp vanilla
3½ cups flour
1 tsp salt
1 tsp soda
1 tsp cream of tarter
1 cup oats
1 cup coconut
1 cup Rice Krispies

Mix in order given. Drop by teaspoon on ungreased cookie sheet. Press with fork. Bake at 350° for 12 – 15 minutes.

Saturday, January 11, 2020

Italian Breadsticks 6/325

The Relation

Susie Wilkinson Degnan is the daughter of Martha Weber Wilkinson (Mart), who is the sister of my great-grandmother, Gertrude Weber Gassmann. Susie and my grandfather were cousins, which would make Susie, my first cousin, twice-removed and Mart would be my great-great-aunt. All of this has been confirmed by Cousin Kathleen (George>Martha>Susie). Please note my father has now asked me if the only reason I call him is to ask him who the people who make these recipes are in relation to me (it is not).

The Process

150 Strokes Later...
If you know me, you know that carbs - particularly bread - are my kryptonite. I have, on multiple occasions, gone to Panera Bread, bought a baguette and eaten the whole thing myself in one sitting. However, I have never made bread. The whole "yeast" and "let rise" concepts always confused me. Making these breadsticks was a learning experience for sure.

My first batch of dough was - to say the least - a failure. I left out the 1/4 cup of olive oil and only noticed after I had started rolling out the little dough noodles. I know, I know - I had clearly been chugging the dumb bitch juice that day. I threw out the batch and tried again (while Roommate Lora looked on, cackling at my stupidity).

Dough Worms
The recipe calls for 100 strokes to mix, I ended up doing closer to 150 (yes, I counted). And after such a specific request, Susie tells us to add flour until "easy to handle". My definition of easy to handle can certainly not be the same as everyone else's. I used approximately an additional cup of flour until it was mildly sticking to my fingers still (but not obnoxiously so).

I watched a video on kneading dough so I could perfect my technique. I've kneaded cookie dough before, but I learned how to do that at the same point in my life I took pottery lessons, so I often get confused on which technique of handling is for clay and which is for dough. For those of you who have never kneaded dough, it is a workout. Post-knead-sesh, I definitely recommend some stretching.

I don't know the ethics of cutting dough, but I did it anyway. Making 32 perfectly equal sections of dough was going to be hard whether or not I put a blade to it, so I figured might as well. I cut the dough into 4 equal pieces and then rolled them into little tubes. Each of these tubes I cut in half once, and then again. So I ended up with 32 equal(ish) dough balls.

2nd Batch vs. 1st Batch
Then I got to work on making little worms out of each of those balls. This was harder than I thought it would be. Using your hands to roll them out is probably the best method, but fingers are not the evenest surface. I ended up having pretty uneven breadsticks. Oh man, and then I got out the plastic wrap. Susie doesn't tell us what to cover the pans with, but I have watched enough of The Great British Baking Show to know that saran wrap seems to be the move. And let's just say plastic wrap and I do not get along very well.

In my head, the sticks would triple or quadruple in size when they had risen (truthfully, I was hoping they would end up like the breadsticks at Olive Garden). That is not what happened. They were almost the exact same size 20 minutes later, and only mildly largest after they took their first voyage into the oven.

My first batch came out with almost every breadstick having scorch marks on them. I took them right out at 20 minutes. In my second attempt, I took them out at 17 minutes and they were much better.

The Feedback

Could be fluffier but okay.
Nothing against Susie, but I did not like these breadsticks. This is entirely because I thought they were going to be big fluffy breadsticks and not skinny, crunchy ones. So, my real fight is with Italian breadsticks overall. I just really think bread should be soft #ChangeMyMind.

But! Everyone else who tried them was a big fan. Fellow climbing gym members gobbled them up and I was left with an empty tin. I did have to toss out the overdone pan. They were not coming back to life after that much time in the sun. I also made one batch where I doubled the size of the breadsticks, where I was able to enjoy the soft bread we all know and love.

The Recipe

ITALIAN BREADSTICKS       CC80
Susie Degnan

1 package active dry yeast
⅔ cup warm (105°-115°) water
1 Tbs sugar
1 tsp salt
¼ cup salad oil
2¼ cups flour
Oil
1 egg white
Course salt
1 Tbs water

In a large bowl, dissolve yeast in warm water. Stir in sugar, salt, oil and 1 cup flour. Beat until smooth – about 100 strokes. Stir in enough of the remaining flour so that the dough is easy to handle. Turn out on lightly floured surface and knead 5 minutes. Divide into 32 equal parts. Roll each into a rope – 8” long for a thick breadstick, 10” long for a thin one. Place on greased baking sheet 1” apart. Brush with oil and cover. Let rise for 20 minutes. Heat oven to 350°. Beat egg white and 1 tablespoon of water. Brush on sticks and sprinkle with course salt. Bake 20-25 minutes until golden. Cool on wire rack.

Monday, January 6, 2020

Old Fashioned Molasses Cookies 5/325

Zean and The Quilt

The Relation

We're continuing the Gerty Gassmann Gold trend strong here. Margie Montzingo (Gertrude>Katharine) is my dad's first cousin and therefore, my first cousin once removed. Her mother is Katharine Gassmann Schaub (better known as Aunt Kay). Now, Aunt Kay is the creator of the oh-so-famous wedding quilt given to my parents for their wedding. It has most, if not all, of the cousin club members' names on it with colored bars to indicate what branch they are from.

The Process

I, Maddy, confess that I had no idea what these cookies were going to look or taste like. The last time I used molasses was in Home Ec class in high school. I remember distinctly that if oil was also an ingredient that needed to be added, you should measure the oil first, as it would help the very sticky molasses slide out of the measuring cup. FYI, this recipe doesn't call for oil. Thanks for nothing, Home Ec.

Peanut Butter or Cookie Batter?
Also, molasses smells odd. Roommate Lora actually asked if I was cooking something with tomatoes in it as I was whipping up these cookies (I told her I was making cookies, to which she asked "with tomatoes in them?"). The molasses gives the batter a rich peanut butter-y color, further confusing me on what these cookies were going to end up looking like.

I chose to use butter instead of shortening and buttermilk instead of yogurt. I did leave the electric mixer going as I prepped all the baking pans. I am no expert baker, but I think this may have affected the texture of the cookies. They ended up wildly puffy and chewy - which in my personal opinion, is not a bad thing.

Harder than it looks
Like any rational human being, I did not add the optional raisins. People who put raisins in cookies should be tarred and feathered. The batter is pretty liquidy (definitely a batter as opposed to a dough) so spooning it onto the baking sheets was pretty tough. I (tried to) use exact teaspoon measurements for each cookie, but it's very hard. So hard that I actually ordered one of those fancy cookie scoops from Amazon while in the midst of this mess.

I baked all of my trays (all four) for exactly 8 minutes. The cookies seemed to be perfect when I took them out. Again, I have no idea what they should look like, but they looked A-okay to me. Better yet, they tasted like gingerbread! This shouldn't be that shocking of a discovery since the recipe does call for ginger, however, I was really worried about how these were going to taste with the odor they were giving off. Makes approximately 50 cookies.
Look at all those air bubbles!

The Feedback

Roommate Lora was a big fan of these cookies. She ate at least an entire trayful as I was still making them. Granted, she hadn't really eaten anything all day, but as someone who doesn't particularly love sweets, I am taking her word as gold. The office gang was similarly pleased, although Office Jordan asked if there was some sort of apple flavor in them (there is not). I will say, they are definitely a cookie with fall and winter type flavors. Perfectly paired with hot cocoa and a toasty fire.


The Recipe

OLD FASHIONED MOLASSES COOKIES - CC80
Margie Montzingo

Preheat oven to 350°.

Beat ½ cup butter or shortening until soft. Gradually add ½ cup sugar and blend until light and creamy. Beat in 1 egg and ½ cup molasses. Have ½ cup yogurt or buttermilk ready. Sift 2½ cups flour, 1 teaspoon baking soda, 1 teaspoon each cinnamon and ginger, ¼ teaspoon cloves and ¼ teaspoon salt together. Add the sifted ingredients in 3 parts to the sugar mixture alternately with the yogurt or buttermilk. Beat the batter until smooth after each addition. Add ½ cup raisins – optional. Drop the batter from a teaspoon onto a greased cookie sheet. Bake 8– 12 minutes.


Sunday, January 5, 2020

Heath Bar Coffee Cake 4/325

The Relation

Grand Pat, Cousin Elaine & Me
Patricia Gassmann, known to her grandchildren as Grand Pat, is the baking queen. This is an admittedly biased opinion, speaking as one of those aforementioned grandchildren. If you had ever been to Grand Pat's house, you would know about the chest freezer full of untold sweet treasures. She stored all of her cookies in Quaker Oat containers (#ReduceReuseRecycle). She was married to Henry Gassmann (Gertrude's 7th oldest child).

The Process

I continue to make these wild assumptions that all ingredients will be listed prior to the start of the instructions... but alas, that has not been the case. Please note that more than half of the ingredients are hidden in the instructions after the list of ingredients concludes.

Brickle Topping Mixture
What in the world is brickle?? I can honestly say I have never heard of brickle in my life. After a quick google search, I found that it is broken up toffee-esque candy used in baking. FYI, they do not carry brickle at the local grocery store. So I was left trying to figure out how to procure brickle.

Instead of actually searching for a specialty bake-shop that might carry brickle, I said: "hmmm Heath bars seem pretty close..." Despite Grand Pat actually calling for Heath bars by name earlier in the recipe, this seemed like the best (easiest) route. NOTE: I later inquired with my Aunt Genie about brickle and she assured me that, yes, Heath bar and brickle are interchangeable. Why Grand Pat felt the need to complicate things, who can say?

Not a 14" x 10" pan
I recommend pre-chopping the Heath bars into smaller pieces before tossing them into the blender. I only broke them up into fourths and ended up having to fish out some of the larger pieces from the batter to chop them up more. Very messy and overall a tragedy of inefficiency.

Right out of the oven, I used the tried and true plastic knife cutting method to get clean squares. Even though I had thoroughly greased the pan, I had the worst time getting them out of the pan. Actually, re-reading the recipe now, I definitely didn't grease and flour the pan... so maybe this is my bad. It still doesn't excuse the fact that Grand Pat calls for a baking pan exactly one inch longer on each side than every standard baking pan I have ever seen. Who owns a 14" x 10" pan??? Honestly.

The Feedback

Even though the entire bottom layer of cake was stuck to the pan, this dessert was amazing. My very pregnant boss could not stop raving about and helped me polish off four pieces during one of our meetings. Super moist and just overall, delicious.

The Recipe

HEATH BAR COFFEE CAKE             CC90
Pat Gassmann

1 stick butter
2 cups flour
1 cup brown sugar
½ cup white sugar

Blend the above ingredients. Reserve ½ cup of mixture. Add 1-cup buttermilk, 1 tsp soda, 1 egg, 1 tsp vanilla, and ½ cup broken Heath Bar. Blend well. Pour into greased and floured 10 x 14 x 2 cake pan. Mix ⅓ cup brickle, ¼ cup pecans and the ½ cup of reserved mixture. Sprinkle over top of batter. Bake at 350° for 30 minutes.


Friday, January 3, 2020

5 Reason Bud Bean Chili 3/325

The Relation

Louie Gassmann (Gertrude>Henry) is my uncle. He is the eldest of the Henry Gassmann kiddos and is the luckiest of the males (at least in the hair department). Barely a gray hair in his luscious locks and every follicle seems to be intact! This chili recipe, I can only assume, is named for the five beers you drink throughout the cooking recipe (five reasons to drink). To say that this is classic Louie humor, would be an understatement.

The Process

Sautéing in unauthorized oil
Let me start by saying that I am not a big drinker. And when I do drink, my tastes are much more of the fruity, girly, bright pink variety (my uncle Frank and I have the exact same tastes on this). Drinking 5 cans of Bud Light is not my idea of fun, but in the name of the project, it had to be done. I also accidentally bought tallboys instead of the recommended 12oz cans, which complicated things a bit. Cooking conversions are hard enough sober, let alone when you're drunk.

This recipe isn't rocket science - which is good considering how much beer you're drinking while executing it. I will say that I appreciate the use of cup measurements in the vegetable section. I never know if I have secured a "large" or "medium" onion when a recipe calls for one. PSA: I used approximately one tablespoon of extra light tasting olive oil as the oil to sauté the vegetables (note: oil is not listed in the ingredients! Get it together, Louie). 

When you Google the phrase "stirring to crumble" there is nothing, and I repeat nothing, about ground meat on there. I assumed that you just cook until brown and crumbly (a safe assumption, right?). It seemed to turn out pretty well, so must be right.

On its way to crumble
I had all the time in the world when I was whipping up this chili, so I went for a cook time of 5 hours. I recommend popping in a movie or two and riding out the buzz (I personally watched Detective Pikachu - great flick).

Don't forget to add the mushrooms at the end and fish out your bay leaves! I was very close to forgetting; thank goodness the can of mushrooms caught my eye. I drained the mushrooms before putting them in the crockpot as the mixture was a little soupy already (same with the pinto beans at the beginning of the recipe). There were no specific instructions, so I figured balls to the wall and go with your gut.

The Feedback

Who said Chili isn't pretty?
I invited some of my close friends over to eat as Good Pal Kramer was in town from his graduate program. Paired with cornbread, broccoli and some homemade mac & cheese made by Bougie Pal Hannah, we had quite the meal. While the chili was delicious, I must say it was rather overshadowed by the mac & cheese (sorry, Louie!). If I made it again, I would probably double the cumin and toss in some salt - but I also really love cumin.

The Recipe

FIVE REASON BUD BEAN CHILI                             CC04
Louie Gassmann

⅔ cup chopped green pepper
¾ cup chopped onions
1 tsp minced garlic
2 lbs lean ground beef
6 cans – 12 oz each  – Bud or Bud Light
Beers consumed
3 cans – 8 oz each – tomato sauce
1 can – 15 oz – red kidney beans
1 can – 14 oz – diced tomatoes
1 can – 4 oz - sliced mushrooms
3 Tbs chili powder
1 Tbs ground cumin
1 tsp ground cinnamon
2 tsp oregano leaves
1½ tsp salt
½ tsp Italian seasoning
½ tsp powdered mustard
⅛ tsp ground red pepper
2 bay leaves

In a crock-pot, pour tomato sauce, red kidney beans, 1 can of beer and all spices. Stir ingredients. Set crock-pot on low – 200°-225°. In large saucepot, heat oil until hot. Add green pepper, onion and garlic sautéing for 3 minutes. Open up second can of beer to drink while sautéing vegetables. Add sautéed vegetables to crock-pot, stirring to mix up all ingredients. Brown ground beef in saucepot, stirring to crumble. Open up third can of beer to drink while browning ground beef. Remove grease from ground beef. Add ground beef to crock-pot, stirring crock-pot again.

Cook at least 2 hours – longer is preferred – 4-6 hours. One half hour before serving, add can of mushrooms, remove bay leaves and drink fourth beer. This should leave you with 2 beers to have with your chili.

Note:  If you like your chili more "soupy", go with a 6-pack of tallboys rather than 12 ounce cans.  Who said cooking isn't fun!!